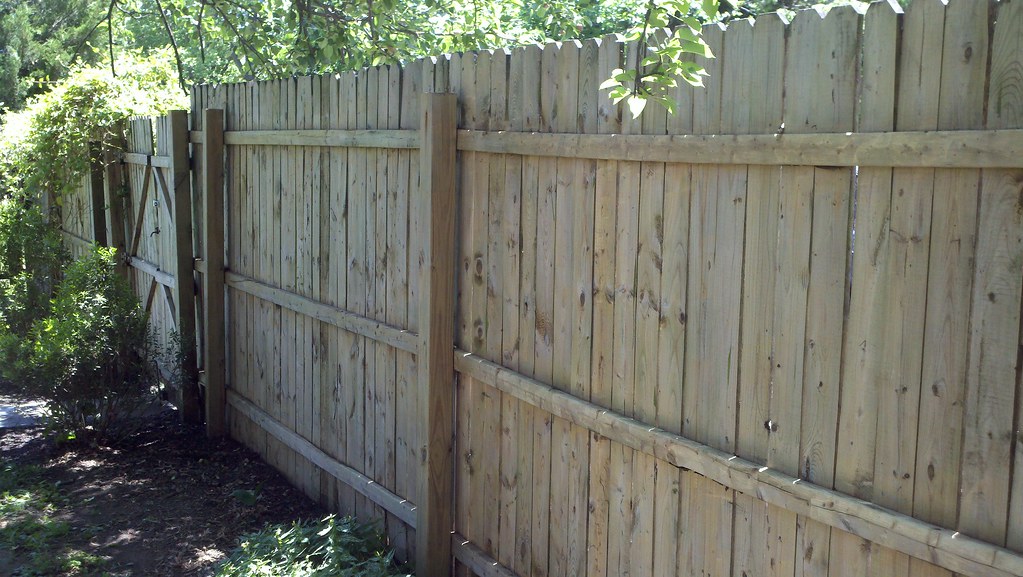
Are you planning to stain your fence but not sure where to start? One crucial step that most homeowners tend to overlook is pressure washing the fence before staining it.
Pressure washing stands out as an highly efficient method for eradicating dirt, grime, and other accumulated debris from your fence’s surface, guaranteeing not only an uniform stain adhesion but also a prolonged durability for the stain.
However, you might wonder: How exactly do you go about pressure washing a fence for staining? What if persistent issues like green algae or mold have taken hold of your fence? Fret not! In this comprehensive guide, we will expertly navigate you through every aspect of pressure washing a fence before staining, ensuring you approach it like a seasoned professional!
The Importance Of Pressure Washing A Fence Before Staining
Pressure washing a fence before staining it is an essential step that should not be overlooked. Over time, fences accumulate dirt, grime, and other buildup that can prevent the stain from adhering evenly to the surface. By pressure washing your fence beforehand, you ensure that the wood’s natural beauty shines through while also extending the life of your stain.
Moreover, pressure washing effectively eliminates any mildew or mold that might have thrived on your fence as a result of excessive moisture. These fungal intruders not only detract from the aesthetic appeal of your fence but, if disregarded, can also gradually undermine its structural integrity over time.
Another benefit of pressure washing your fence before staining is that it will help smooth out any rough or splintered areas caused by weathering or wear and tear. This ensures a consistent finish throughout the entire length of the fence.
How To Pressure Wash And Stain Fence
Pressure washing and staining your fence is a great way to enhance its look and prolong its lifespan. It’s important that you follow the right steps when pressure washing and staining your fence to avoid damaging it. Here are some tips to help you get started:
First and foremost, it’s imperative to ensure that the fence’s surface is meticulously clean and devoid of any debris before embarking on the pressure washing journey. This meticulousness will guarantee optimal penetration of the cleaning solution into the wood pores, yielding superior outcomes.
Next, fine-tune the pressure washer nozzle to suit your specific requirements, and commence at one extremity of the fence, tackling it in small, manageable sections. Crucially, hold the wand at a 45-degree angle in relation to the wood surface, as this precaution will shield against any potential damage or gouging.
Upon the completion of the pressure washing endeavor, it is vital to allocate a sufficient drying period before progressing to the stain application phase. Depending on prevailing weather conditions, you may need to exercise patience, as it might take anywhere from 24 to 72 hours post-cleaning for the wood to completely dry.
Before applying stain onto your fence, stir well using a paint stick before opening so that pigment blends properly throughout can achieve good coloration without seeing blotches or streaks.
When applying stain use even strokes along with grain direction (if visible) so as not leave uneven brush marks behind which may appear unprofessional looking over time due exposure from elements like sun or rain.
How Can I Clean My Fence Of Green Algae, Mold, And Mildew?
Green algae, mold, and mildew can easily grow on a fence, especially in moist environments. Apart from being unsightly, they can also cause damage to the wood over time if left untreated. However, it’s essential to clean them off before staining your fence because stains won’t adhere well to these contaminants.
1. Homemade Fence Cleaner
If you’re on the hunt for a cost-effective and environmentally friendly approach to prep your fence for staining, consider crafting your very own homemade fence cleaner. Here are some effortless recipes that can effectively combat dirt, grime, mold, and mildew on your fence.
One of the most straightforward DIY fence cleaners involves blending white vinegar and water. In a container, combine equal parts of both ingredients and thoroughly mix them. Subsequently, apply this concoction to your fence using a brush or sprayer, allowing it to sit for approximately 10-15 minutes. Finish by rinsing it off with clean water, and you’ll be pleasantly surprised by the results.
Another popular homemade cleaner involves using baking soda as the main ingredient. To create this solution, dissolve half a cup of baking soda in one gallon of warm water until it forms into a paste-like consistency. Apply onto your wooden or vinyl fence surface using bristle brushes then rinse thoroughly after 20 minutes.
Consider mixing lemon juice and cream of tartar together to make another cleaning option that’s effective against rust stains: Mix these two ingredients in equal parts (1/4 cup each) in one quart of hot water until dissolved completely then apply it directly onto any rusty areas on your fencing by brushing gently over them!
2. Wood Fence Cleaner
When it comes to cleaning wood fences, there are a variety of options available. One effective option is using a wood fence cleaner. These cleaners are specifically formulated to clean and brighten wood surfaces without damaging the material.
To use a wood fence cleaner, start by wetting down your fence with water. Then, apply the cleaner according to the manufacturer’s instructions. Usually, this involves spraying or brushing on the solution and allowing it to sit for several minutes before rinsing off with water.
One benefit of using a wood fence cleaner is that it can remove tough stains like mildew and algae that may have built up over time. It can also help restore the natural color of your wood fence.
However, it’s important to note that not all cleaners are created equal. Some products may contain harsh chemicals that could damage your fence or harm nearby vegetation. Always read labels carefully and choose a product that is safe for your particular type of wood.
If you’re looking for an effective way to clean your wooden fence before staining, consider using a quality wood fence cleaner as part of your preparation process.
3. Bleach
Bleach is a handy solution that can effectively remove algae, mold, and mildew from your fence. However, it can be harsh on wood if not used properly. Before using bleach, make sure to test a small area first to see how the wood reacts.
To use bleach as a cleaner for your fence, mix one part of bleach with four parts of water in a bucket. Use gloves and eye protection when handling the mixture to avoid any possible skin or eye irritation.
Apply the bleach mixture onto the affected areas using a brush or sprayer and let it sit for 10-15 minutes. Rinse off the solution thoroughly with clean water using a pressure washer or hose.
Make sure to keep children and pets away from any areas where you are applying bleach until it has been fully rinsed off and dried.
Remember that overuse of bleach can harm your fence’s integrity by breaking down its fibers over time. Use caution when working with this chemical solution.
Conclusion
After emphasizing the significance of pressure washing a fence before staining and presenting a range of approaches for cleaning the fence, it is evident that pressure washing is an indispensable step in ensuring a triumphant and enduring stain. By eliminating dirt, grime, algae, mold, and mildew from the wood’s surface, you are facilitating the stain to profoundly infiltrate the wood’s pores.
FAQ
Should you pressure wash wood fence before staining?
If you’re planning to stain your wood fence, it’s crucial that you pressure wash it before applying any stain. But why is this so important?
Firstly, a dirty fence won’t allow the stain to adhere properly. Any dirt, debris or grime on the surface will create a barrier between the wood and the stain, leading to an uneven finish.
Moreover, pressure washing helps remove any mold and mildew that might have accumulated on your fence over time. These can not only damage your fence but also cause health problems for people with allergies or respiratory issues.
Pressure washing also reveals any areas of rot or decay in the wood. This is important because staining over damaged wood won’t improve its condition and could make things worse by trapping moisture inside.
To summarize, pressure washing your wooden fence before staining is essential for achieving a smooth and long-lasting finish while protecting both your property and health from harmful elements.
How long after pressure washing can you stain a fence?
After pressure washing your fence, you must wait for it to dry completely before staining. The waiting time varies depending on the type of wood and the weather conditions in your area.
If you live in a dry climate, it may take only a few hours for the fence to dry after pressure washing. However, if you live in a humid environment or if there has been rain recently, it could take up to 48 hours for the fence to completely dry.
To determine whether your fence is ready for staining, perform what is called a “water drop test.” Simply sprinkle some water on the surface of your fence. If the water droplets are absorbed into the wood within several seconds, then it’s safe to proceed with staining.
It’s important not to rush this step as applying stain over wet or damp wood can result in an uneven application that won’t last as long as proper handling. Remember: patience is key when dealing with any home improvement project!
How do you pressure wash a fence for staining?
Before staining your fence, it is important to pressure wash it thoroughly. Pressure washing helps remove dirt, grime, and any loose paint or stain from the surface of the fence. Here are some steps to follow when pressure washing a fence for staining:
1. Start by preparing the area around the fence. Remove any objects that may be in your way during cleaning.
2. Next, cover plants or landscaping near the fence with plastic sheeting to protect them from damage.
3. Adjust your pressure washer nozzle to a low-pressure setting and start applying water on one section of the fence at a time.
4. Hold the wand about 6-8 inches away from each board and move it slowly across each board lengthwise.
5. Be sure not to get too close as high-pressure can damage wood surfaces.
6. Work systematically along each board until all sections have been covered completely.
7. Once you’ve finished cleaning all boards, let them dry for at least 24 hours before proceeding with staining application.
By following these simple steps, you can ensure that your wood fencing looks great after being stained!
How do you prepare a weathered fence for staining?
In summary, pressure washing your fence before staining is crucial for achieving a smooth and even finish. It helps to remove dirt, grime, mold, mildew and other unwanted debris that may have built up over time. By following the steps outlined in this guide, you can effectively prepare your fence for staining.
However, if you have a weathered fence with peeling or flaking paint or stain, pressure washing alone may not be enough. In such cases, it’s essential to strip off the old finish using a wood stripper before proceeding with pressure washing. This will ensure that the new stain adheres well to the surface of your fence.
Remember also to let your fence dry completely before applying any stain. A drying time of at least 48 hours after pressure washing is recommended.
By taking these necessary steps and being patient throughout the process of preparing your weathered fence for staining, you’ll achieve excellent results that will last for years to come!
Read More Blog Post= https://trueprezure.com/simpson-vs-dewalt-pressure-washers/